Check out my Key Lime Cheesecake Recipe. As with all my recipes, I put the recipe at the top of the post and notes and tips at the bottom.
Key Lime Cheesecake Recipe
Ingredients
For the Graham Cracker Crust
- ¾ C Melted butter
- 2½ C Graham Cracker Crumbs
- 2 tsp Cinnamon
For the Cheesecake
- 16 oz Philadelphia Cream Cheese room temperature
- 16 oz Lucerne Cream Cheese room temperature
- 1¼ C Sugar
- ½ C Sour Cream
- 2 tsp Vanilla
- 4 Large Eggs room temperature
- 12 Key Limes See post regarding types of limes
Instructions
The Graham Cracker Crust
- Prepare the spring-form pan. Place parchment paper at the bottom on the pan and lightly spray the paper and sides of the pan with cooking spray. You can line the sides with parchment paper as well, but I found that to be unnecessary.
- Place the graham cracker crumbs in a medium bowl.2½ C Graham Cracker Crumbs
- Mix the cinnamon into the graham cracker crumbs2 tsp Cinnamon
- Melt the butter (the flavor of the crust can be more toasted if you brown the butter. To do this, stir the butter over medium heat. It will start to bubble and then the bubbling will go back down. It should start to brown shortly thereafter).¾ C Melted butter
- Add the melted butter into the bowl and mix with a whisk until evenly moistened.
- Pour the crust into the pan and press the crust around the pan evenly using the bottom of a flat cup. (Note: I prefer a thicker, flat crust so that there is an equal amount of crust in each bite. If you wish to have the crust go up the sides, you can do so by pressing the crust against the sides of the pan.)
The Key Lime Cheesecake Filling
- Preheat the oven to 250°F.
- Place all of the cream cheese into the KitchenAid mixer bowl. Using the beater attachment (not the whisk), mix the cream cheese until smooth. Medium speed is fine. Do not worry about overmixing the cream cheese. You need to make sure it is smooth at this step (and before you add the eggs).16 oz Philadelphia Cream Cheese, 16 oz Lucerne Cream Cheese
- Add the sugar, sour cream, and vanilla. Continue mixing. You may need to scrape the sides of the bowl using a spatula. You will mix until it looks smooth and uniform in color.1¼ C Sugar, ½ C Sour Cream, 2 tsp Vanilla
- Add the eggs, two at a time. You only mix until the eggs are incorporated into the mix (ie: uniform in color). You do not want to overbeat the eggs. I've use the KitchenAid at low speed and finish with a hand whisk just to ensure no eggs are missed.4 Large Eggs
- Cut the key limes in half and squeeze the juice through a strainer into a small bowl. This should make about ½ C of key lime juice.12 Key Limes
- Zest the rinds of limes into the bowl – leaving four key limes unzested (you will zest these on top of the key lime cheesecake once it is done).
- Pour the key lime juice and zest into the cheesecake mixture. Mix by hand until batter is an even consistency.
- Gently pour the cheesecake mix onto the crust in the spring form pan.
- You can even out the top of the cheesecake with a spatula or by lightly tapping the bottom of the pan flatly against the countertop.
Bake the Cheesecake
- Bake the cheesecake at 250°F for 1 hour and 15 minutes. Place the cheesecake on the top rack so it is in the center of the oven. Also, place a large cookie sheet on the bottom rack beneath the cheesecake. The cheesecake may "weep" extra moisture from the butter or fat from the cream cheese. The cookie sheet will catch this and help avoid mess in the oven.
- After one hour, turn off the oven and crack it open slightly. You can wedge a hot pad against the oven door to stop it from closing all the way. This will vent the oven while allowing the residual heat to continue the baking process. Allow the cheesecake to sit in the oven for an additional 60 minutes.
- After this second hour, the center of the cheesecake should still be a little jiggly. Remove it from the oven and let the cheesecake cool to room temperature (about another hour). Allowing the cheesecake to cool will help prevent it from "sweating" in the refrigerator.
- Zest the remaining lime rinds evenly over the cheesecake.
- Chill the cheesecake in the refrigerator for at least 3-4 hours. Overnight is best.
Backstory to the Key Lime Cheesecake Recipe
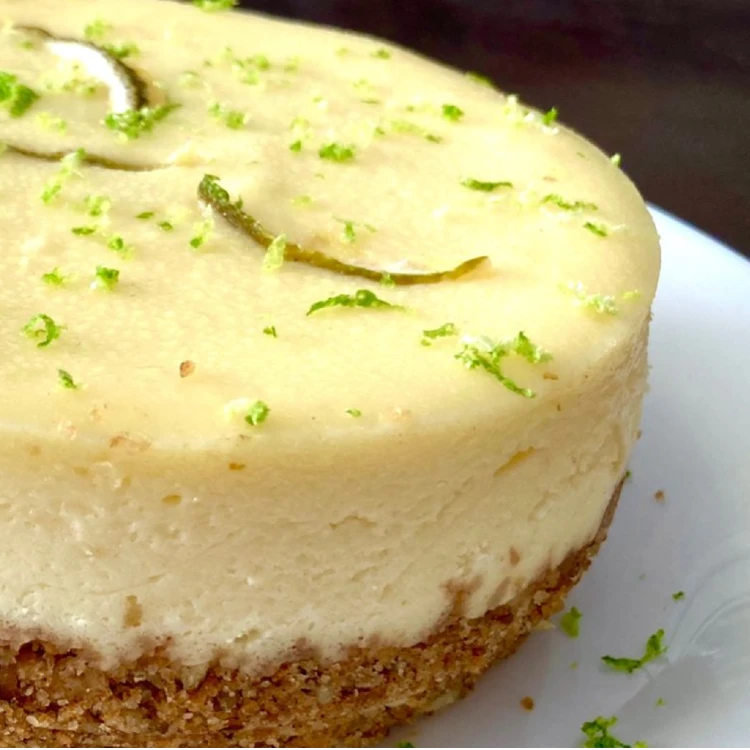
Key Lime Pie with a graham cracker crust is one of my favorite pies. So when I decided to try to become the Cheesecake Guy, key lime cheesecake was on the top of my list of cheesecakes to make.
My favorite thing about the Key Lime Cheesecake is that it has an initial tartness but mellows out to a nice, sweet cheesecake flavor. I especially love how it combines with the Graham Cracker Crust.
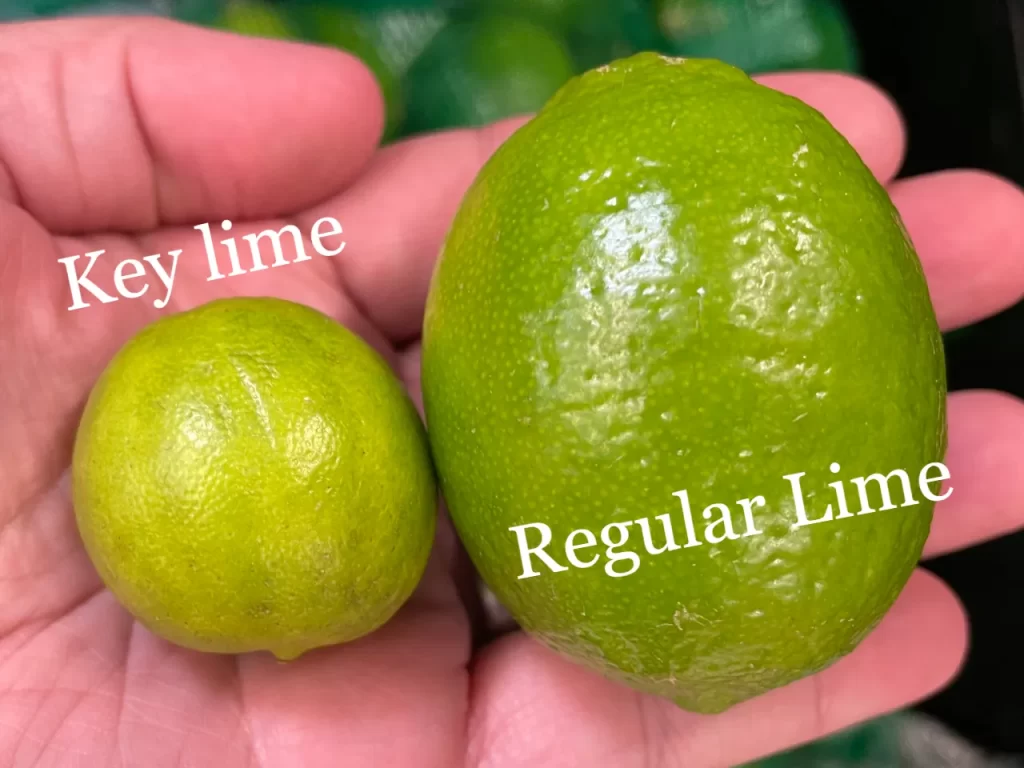
Key Limes vs. Regular Limes
Key limes are much smaller than regular limes. Other than that, I’m honestly not too sure if there’s a big difference. There are conflicting messages out there. For instance, a trained pastry chef Elizabeth LaBau, of SugarHero.com, explains that key limes have “a higher acidity level than regular limes, which gives them a more intense and tart flavor.” Meanwhile, a US citrus producer out of Texas, US Citrus, claims the exact opposite–that “regular limes have a lower PH and higher acidity than key limes.” America’s Test Kitchen appears to have tested the acidity, but the article is behind a paywall and I’m not going to access that.
What I can tell you, is that my taste buds cannot distinguish a notable difference between a regular lime or a key lime. They both taste like lime to me. I’ve also tested Key Lime Cheesecake with freshly squeezed juice from a regular lime, freshly squeezed juice from key limes, and lime juice from the little plastic bottles from the grocery store. There is honestly no tangible difference in the outcome. They all taste like a lime cheesecake.
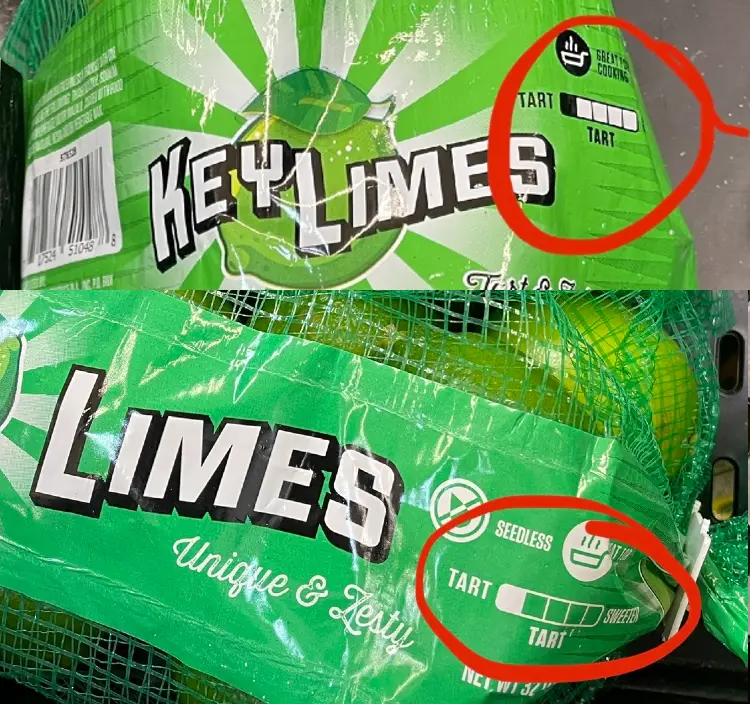
I ran over to the local grocery store to see if I could get a lime and key lime to compare them. I found that the producers of the limes have a “tartness” chart on the bags of each kind of lime. Both limes have the same level of tartness on this chart. This means that the producers of the limes are not touting a difference in tartness.
I only use key limes for one reason and one reason only…I want to call my cheesecake a “Key Lime” cheesecake instead of a “Lime” cheesecake. “Key Lime” just sounds more exotic than regular old lime. Of course, a regular old lime is actually a Persian lime. So I supposed I could call my cheesecake a “Persian Lime Cheesecake.” That sounds pretty exotic as well.
So whether you use key lime, Persian limes, or whatever limes are in those plastic squeeze bottles, just use a half-cup and your Key Lime Cheesecake should turn out just fine.
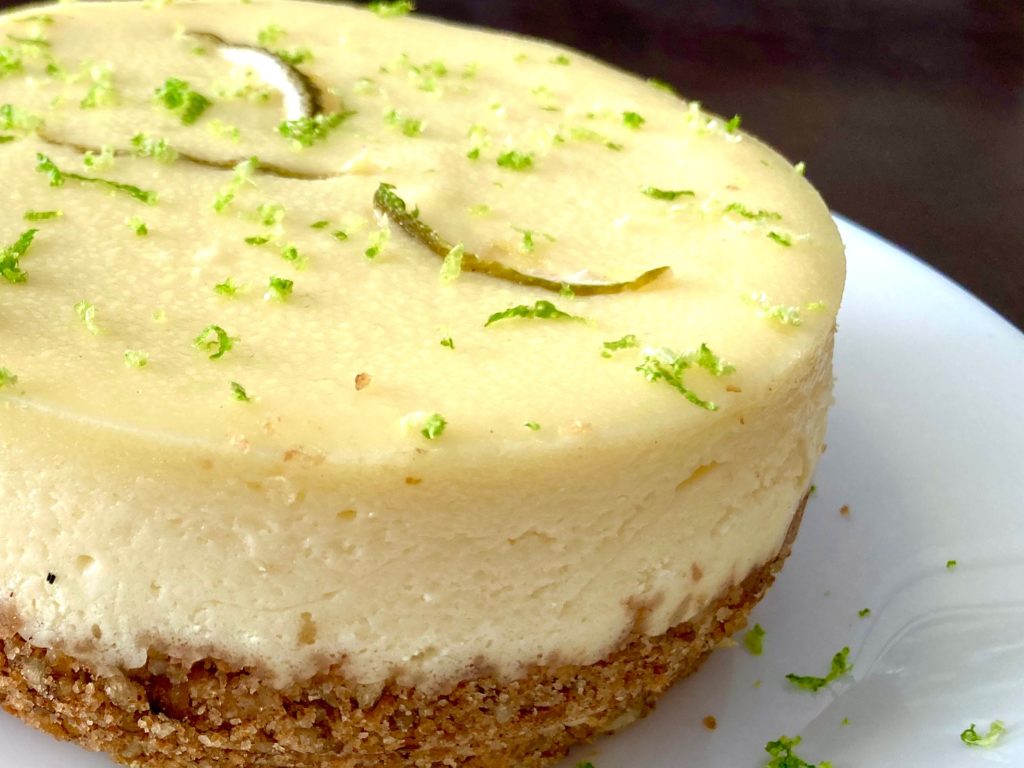
That being said, you should definitely add the zest. I think having the look of the zest adds at the very least a placebo effect to the flavor. I just feel like the cheesecake has more limey goodness when I can see the bright green zest. It presents better overall.
A Note about the Zest
In the picture of the Key Lime Cheesecake I used, I tried baking it with a little strip of lime rind. Do not do that. Baking a part of the lime will make it a dull, bland green which is not pleasant to look at. And while you can eat some lime zest without a problem, a strip of lime rind is not pleasant to eat.
Add rind zest at the end, after the cheesecake has cooled. That will provide the best optics and eating experience.
Storing and Freezing a Cheesecake
Cheesecake needs to be refrigerated. This is why, to my chagrin, cheesecake is not a cottage food. I’ve found that if you keep a cheesecake covered, it is at its best for 2-3 days; maybe 4. After about four days it seems the cheesecake hardens on the outside. It becomes significantly less pleasant. Also, I just grow uneasy about eating cheesecake that’s been sitting in the fridge for over three days.
If I’m worrying, “Is this still good?,” it makes for a less enjoyable eating experience.
If we don’t plan on eating cheesecake right away, we’ve had good luck freezing cheesecake. To do this, double-wrap it completely in Saran wrap, but only after it has gone through the full baking and refrigeration process. This will allow the cheesecake to properly set in the normal course. Do not freeze it with toppings. The toppings never seem to take freezing as well as the cheesecake itself.
To thaw, place it in the refrigerator the night before you want to eat it. When it thaws, it is as good as new. Cheesecake handles the freezing and thawing process quite well.
How long you can keep a cheesecake in the freezer is, like the key lime issue, another topic where you will find mixed statements on the internet. Southern Living Magazine says “not longer than 3-6 months.” Other writers say “up to 2 months.”
I have not tested how long a cheesecake will last frozen. I don’t think I’ve kept a frozen cheesecake for longer than 2 weeks. Why would you be freezing a cheesecake for so long? How much freezer space do you have where you are okay with having a giant cheesecake in there for months at a time?
If you have questions…
The recipe should be pretty straightforward, but if you have a question or comment, drop a line below. I may or may not answer it.