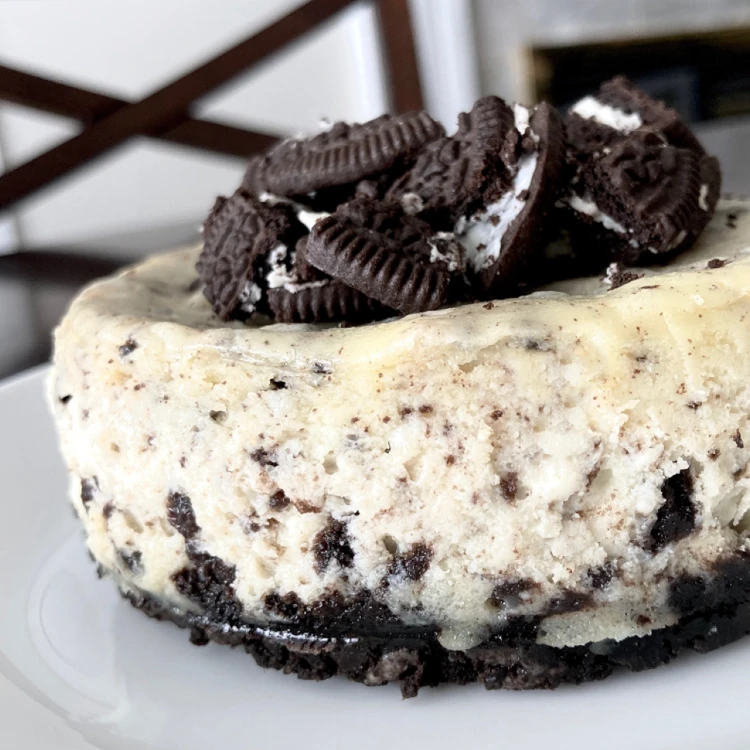
This Oreo cookies and cream cheesecake recipe is a hit with kids (and adults). It is one of my staple cheesecake recipes. Check out the recipe and my notes below.
Oreo Cookies & Cream Cheesecake Recipe
Equipment
- 1 Spring form pan, 9 inches
- Food Processor
- KitchenAid (or mixer of your choice)
Ingredients
The Cookies & Cream Crust
- 2½ C Oreo crumbs (2 rows of Oreos–see post for details)
- 6 T butter, melted
The Cheesecake
- 16 oz Philadelphia Cream Cheese
- 16 oz Lucerne Cream Cheese
- 1¼ C Sugar
- ½ C Sour cream
- 2 tsp Vanilla
- 4 Large Eggs
- 2 C Oreo Cookie Chunks (about a row-and-a-half of oreos–see post for more info)
Instructions
The Oreo Crust
- Prepare the spring-form pan. Place parchment paper at the bottom of the pan and lightly spray the paper and sides of the pan with cooking spray. You can line the sides with parchment paper as well, but I found that to be unnecessary.
- Using a food processor, grind the Oreos into crumbs. You will use two sleeves of Oreos from a party-size package (see post notes).
- Place the Oreo crumbs into a medium bowl.
- Add the melted butter to the Oreo crumbs.
- Mix the crumbs and butter until evenly moistened.
- Pour the crust into the pan and press the crust around the pan evenly using the bottom of a flat cup. (Note: I prefer a thicker, flat crust so that there is an equal amount of crust in each bite. If you wish to have the crust go up the sides, you can do so by pressing the crust against the sides of the pan.)
The Oreo Cheesecake Filling
- Preheat the oven to 250°F.
- Place all of the cream cheese into the KitchenAid mixer bowl. Using the beater attachment (not the whisk), mix the cream cheese until smooth. Medium speed is fine. Do not worry about overmixing the cream cheese. You need to make sure it is smooth at this step (and before you add the eggs).
- Add the sugar, sour cream, and vanilla. Continue mixing. You may need to scrape the sides of the bowl using a spatula. You will mix until it looks smooth and uniform in color.
- Add the eggs, two at a time. You only mix until the eggs are incorporated into the mix (ie: uniform in color). You do not want to overbeat the eggs. I use the KitchenAid at low speed and finish with a hand whisk just to ensure no eggs are missed.
- Add Oreo Cookie Chunks. I just break the cookies by hand into at least fourths. See post notes for more details.
- Gently mix by hand until well incorporated.
- Gently pour the cheesecake mix onto the crust in the spring form pan.
- You can even out the top of the cheesecake with a spatula or by lightly tapping the bottom of the pan flatly against the countertop.
Baking the Cheesecake
- Bake the cheesecake at 250°F for 1 hour and 15 minutes. Place the cheesecake on the top rack so it is in the center of the oven. Also, place a large cookie sheet on the bottom rack beneath the cheesecake. The cheesecake may "weep" extra moisture from the butter or fat from the cream cheese. The cookie sheet will catch this and help avoid mess in the oven.
- After the initial baking, turn off the oven and crack it open slightly. You can wedge a hot pad against the oven door to stop it from closing all the way. This will vent the oven while allowing the residual heat to continue the baking process. Allow the cheesecake to sit in the oven for an additional 60 minutes.
- After this second hour, the center of the cheesecake may still be a little jiggly. Remove it from the oven and let the cheesecake cool to room temperature (about another hour). Allowing the cheesecake to cool will help prevent it from "sweating" in the refrigerator.
- Chill the cheesecake in the refrigerator for at least four hours. Overnight is best.
All About the Oreos
Use Authentic Oreos
Making Oreos must not be that easy because the knock-off brands are never as good as the real thing. The generic brand that comes the closest is Tuxedos by Signature Kitchens. These are sold at Safeway and Albertsons. Still, Oreos are noticeably better.
If you want the best cookies & cream crust, you have to buy authentic Oreos.
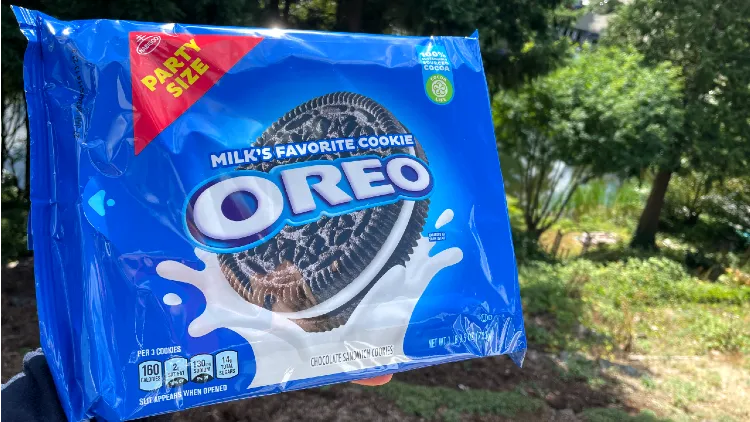
You will also want to buy the party sized, regular Oreos for this recipe (not double stuffed).
The original Oreos, as opposed to double-stuffed, make the best crumbs for the cheesecake crust. Full disclosure: I prefer regular Oreos to double-stuffed Oreos regardless.
Do not use Double Stuff Oreos
There is some science to back up my opinion to not use double-stuff Oreos in this recipe. Food scientist Bruno Xavier examined Oreo cookies on behalf of the Wall Street Journal. Dr. Xavier notes that the Oreo filling is not a dairy product in that it uses no cream. This means that the “cream” in the Oreo is not “cream” at all–it’s “creme.” Pursuant to the FDA, “cream” is a dairy product and “creme” is non-dairy. Instead of cream, the Oreo creme is made with (among other things) oil, and Dr. Xavier says it is likely mostly palm oil.
Therefore, the recipe must take into account that Oreos already have their own oil. Consequently, I use less butter in this crust recipe than I do for my main Graham Cracker Crust recipe for cheesecake. The creme within the Oreo acts as an additional source of fat and moisture to make up for the difference. If you were to use double-stuff Oreos, you would double the amount of oil in the crust (at least by mass, according to truthinadvertising.org).
Using the Oreos
You purchase the party-size package of Oreos because it contains four rows of cookies–just enough for this recipe.
Two rows are for the crust, a row-and-a-half is for the filling, and the final half-row is to garnish the top.
To make the crumbs for the crust, use two sleeves from the Oreo package and grind them up in a food processor. This should be about 30 cookies and that makes approximately 2 ½ cups of crumbs.
To add the Oreos to the filling, there are a few options:
- You can put the row-and-a-half worth of Oreos in a gallon-size ziplock bag and smash them up with a rolling pin. Just be careful not to smash them up too much that they become crumbs.
- You can break them apart into fourths (approximately) just using your hands.
- You can actually cut them into fourths with a knife.
I personally do option 2. I just take a couple in my hand and squeeze them so they break into chunks. It doesn’t matter that they are not uniform in size (in fact I like it.) This method also prevents them from getting too smashed up and it goes by pretty quickly.
When I’m adding the cookies I think about it this way…. When I’m eating cookies and cream ice cream, I like when I get a scoop that has a giant chunk of cookie in it. I feel like I hit the jackpot.
I try to do the same thing with the cheesecake. If there are a few big pieces of cookie in the batter, that’s going to be an awesome slice. But if all the pieces of cookie are that big, it’s not as special to get a big piece.
As for garnishing the cheesecake, do not add Oreos on top until you are ready to serve it. If you refrigerate the Oreo cookies on top, they will get stale and soft.
When you are ready to garnish, crumble the cookies the same way you did for the batter and place it on the cheesecake in way that looks good to you.
A Note on the Cream Cheese
You will see that the recipe calls for two different types of cream cheese. That’s not a typo.
I’ve explained this in detail in my Ultimate World’s Best Cheesecake Recipe, but the gist is that your cheesecake needs to use Philadelphia Cream Cheese. But I found that using only Philadelphia Creme Cheese seems to make a cheesecake that is too soft.
Using a different cream cheese along with Philadelphia seems to create a better balance of creamy and thick. I recommend Lucerne brand from Safeway or Albertsons. But if you don’t have that, just use another mid-level cream cheese. The only one I have tried that I don’t recommend is the Great Value brand from Walmart. I wish I could recommend it because it’s inexpensive for cream cheese, but every time I’ve used it, my cheesecake has ended up with a playdoughy texture.
Final Tips!
- I like a thick, flat layer of crust. It ensures every bite of cheesecake has the optimum ratio of crust to cheesecake (in my humble opinion). If you want crust up the sides, there should be enough to do that.
- I do not pre-bake my crusts, so this recipe does not call for pre-baking.
- I do not believe in the water bath, so this recipe does not require a water bath.
- If the cheesecake appears a little jiggly after baking in the oven, realize that is normal. It will reach its final form through the refrigeration process.
- The texture of the cheesecake is better after it has been able to sit in the refrigerator overnight.
- Before unclasping the spring form pan, run a knife around the edges of the cheesecake. This will help separate the cheesecake from the pan.