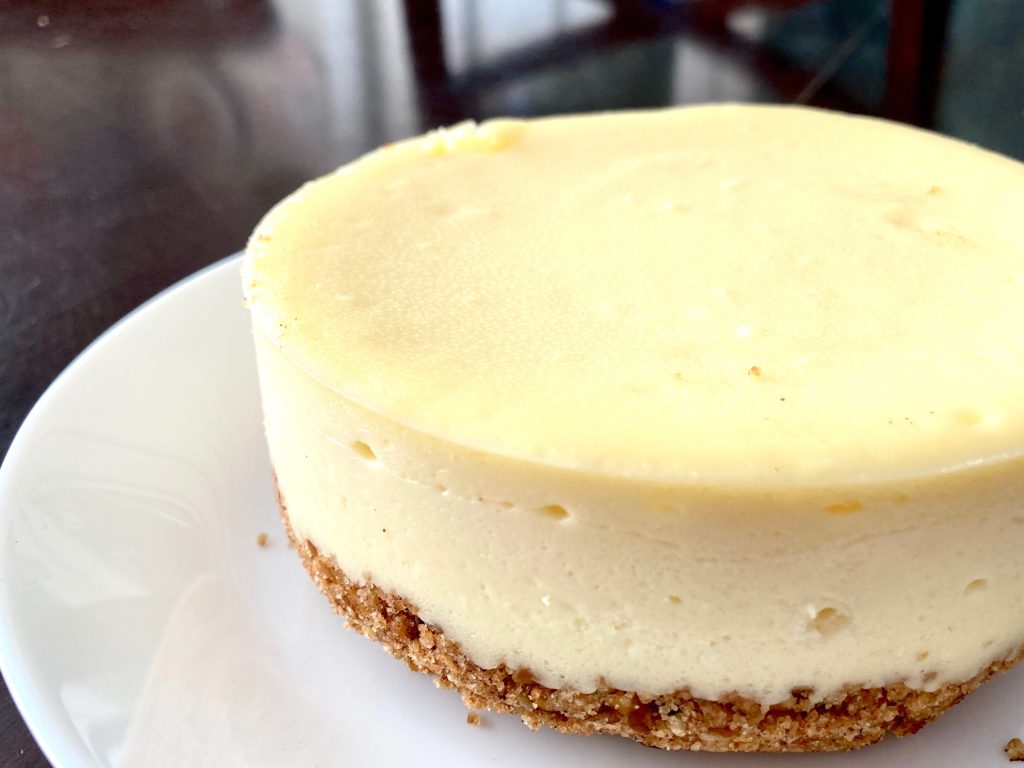
The Ultimate World’s Best Basic Cheesecake Recipe (no water bath)
Equipment
- KitchenAid Mixer
- Spring Form Pan 9 or 10 inch
- Parchment Paper (cut to fit the spring form pan)
- Flat Bottomed Cup (or something similar to press the crust)
Ingredients
The Graham Cracker Crust
- ¾ C Butter, melted
- 2½ C Graham Cracker Crumbs
- 2 tsp cinnamon
The Cheesecake
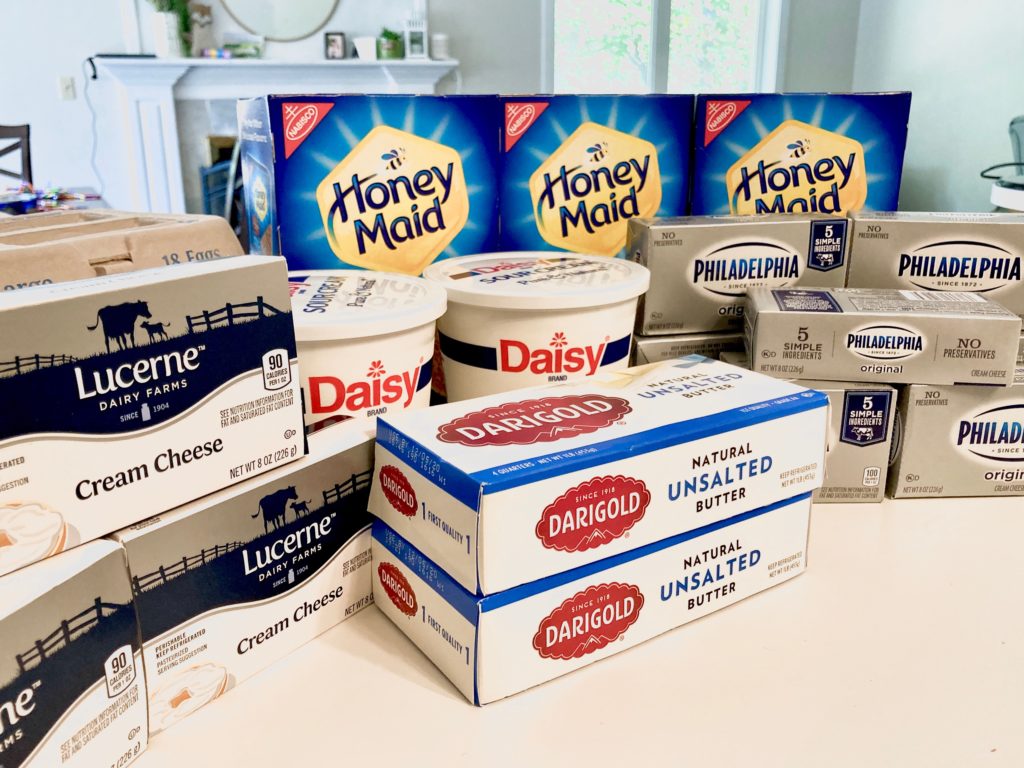
- 16 oz Philadelphia Brand Cream Cheese
- 16 oz Lucerne Brand Cream Cheese (see more in notes)
- 1¼ C Sugar
- ½ C Sour cream
- 2 tsp Vanilla
- 4 Large eggs
Instructions
To make the Graham Cracker Crust
- Prepare the spring-form pan by placing parchment paper at the bottom and lightly spray the paper and sides of the pan with cooking spray. You can line the sides with parchment papers as well, but I found that to be unnecessary.
- Melt the butter (the flavor of the crust can be more toasted if you brown the butter. To do this, stir the butter over medium heat. It will start to bubble and then the bubbling will go back down. It should start to brown shortly thereafter).¾ C Butter, melted
- Put graham cracker crumbs in a medium bowl.2½ C Graham Cracker Crumbs
- Mix the cinnamon into the graham cracker crumbs2 tsp cinnamon
- Add the melted butter into the bowl and mix with a whisk until moistened.
- Place graham cracker crust mix into the spring form pan.
- Press the crust around the pan evenly using the bottom of a flat cup. (Note: I prefer a thicker, flat crust so that there is an equal amount of crust in each bite. If you wish to have the crust go up the sides, you can do so by pressing the crust against the sides of the pan.)
- Note: I do not pre-bake the crust.
To make the cheesecake filling
- Preheat the oven to 250°F.
- Place all of the cream cheese into the KitchenAid mixer bowl. Using the beater attachment (not the whisk), mix the cream cheese until smooth. Medium speed is fine. Do not worry about overmixing the cream cheese. You need to make sure it is smooth at this step (and before you add the eggs).16 oz Philadelphia Brand Cream Cheese, 16 oz Lucerne Brand Cream Cheese
- Add the sugar, sour cream, and vanilla. Continue mixing. You may need to scrape the sides of the bowl using a spatula. You will mix until it looks smooth and uniform in color.1¼ C Sugar, ½ C Sour cream, 2 tsp Vanilla
- Add the eggs, two at a time. You only mix until the eggs are incorporated into the mix (ie: uniform in color). You do not want to overbeat the eggs. I've use the KitchenAid at low speed and finish with a hand whisk just to ensure no eggs are missed.4 Large eggs
- Pour the cheesecake mix onto the crust in the spring form pan.
- You can even out the top of the cheesecake with a spatula or by lightly tapping the bottom of the pan flatly against the countertop.
Baking the Cheesecake
- Bake the cheesecake at 250°F for 1 hour and 15 minutes. Place the cheesecake on the top rack so it is in the center of the oven. Also, place a large cookie sheet on the bottom rack beneath the cheesecake. The cheesecake may "weep" extra moisture from the butter or fat from the cream cheese. The cookie sheet will catch this and help avoid mess in the oven.
- After one hour, turn off the oven and crack it open slightly. You can wedge a hot pad against the oven door to stop it from closing all the way. This will vent the oven while allowing the residual heat to continue the baking process. All the cheesecake to sit in the oven for an additional 60 minutes.
- After this second hour, the center of the cheesecake should still be a little jiggly. Remove it from the oven and let the cheesecake cool to room temperature (about another hour). Allowing the cheesecake to cool will help prevent it from "sweating" in the refrigerator.
- Chill the cheesecake in the refrigerator for at least 4 hours. Overnight is best.
Notes
Creating the Ultimate World’s Best Cheesecake Recipe
The Ultimate World’s Best Cheesecake Recipe is the product of my cheesecake journey. I started out thinking that I would make and sell a cheesecake that was universally loved. I therefore tried and tweaked numerous cheesecake recipes and variations. I also tried different quality and price points of ingredients in the cheesecake recipes. The point was to find the recipe and ingredients that would be the definitive world’s best cheesecake.
This cheesecake recipe is the product of all of that testing.
I certainly hope you will try it and enjoy it.
But one lesson I learned in all of this testing is that tastes are totally subjective. So if you try this recipe, I’d be interested to hear your view!
Tips for Prepping the Pan
You first need a piece of parchment paper to line the bottom of your spring-form pan. Unless you have a pre-cut and pre-sized piece of parchment, you will have to cut this yourself.
To do so, remove the bottom of the spring-form pan. Place the bottom of the springform pan on top of a sheet of parchment paper. Using a pencil, trace around the pan bottom. You can then cut the circle out using the pencil line as a guide. Cut on the inside of the pencil line so that the lead tracings will not be on the paper that is used in the pan.
You can also cut a piece of parchment paper to line the sides of the pan. To do this, you can use the sides of the spring-form pan to get the right width. However, I do not use parchment on the sides. I think it creates more work than it is worth.
Once the parchment paper is set, spray the entire inside of the pan with cooking spray. Yes, I even spray some on the parchment paper itself.
Your spring-form pan is now ready.
Tips for making the Cheesecake Graham Cracker Crust
You can melt or brown the butter
If you melt butter in the microwave, go low and slow. If you heat it too fast, it will pop and spray butter everywhere.
I melt butter in the microwave by first cutting it into 1-tablespoon slices and then evenly distributing those slices in a bowl. I then place it in the microwave for 20 seconds at 50% power. Check it and stir. If it needs to melt more, do 10-second intervals at 50% power, checking and stirring until it is melted.
But more often I melt butter on the stovetop. I place it in 1-tablespoon slices in a saucepan over medium heat, stirring occasionally until it is completely melted.
Browning the butter can give it a more rich, nutty flavor. To brown the butter, keep it over the heat until it starts to bubble aggressively. Stir constantly. Eventually, the bubbling will start to go down. This is because the moisture in the butter is burning off. You will begin to see what looks like brown, grainy specs at the bottom of the pan. This is toasted milk solids. It is the brown part of browned butter. I let the butter continue to toast until the liquid turns a light brown color.
You do not need to pre-bake the crust
As I was creating this recipe, I noted that a lot of cheesecake recipes out there have you pre-bake the crust. I started out doing that but then I tried making cheesecake without doing so. It was just fine. If there is any difference, it is negligible.
I like skipping the pre-baking of the crust because it just adds more time to the prep. Since there is no substantial difference in the result, I say skip it.
Options on crust layout
This graham cracker crust recipe is designed to be a thick, flat crust. The reason for this is that I like my cheesecake to have a good amount of crust with it. When I order cheesecake at a restaurant, the crust is usually thin until you get to the end, which has crust from the bottom and sides. I always felt like the extra crust was better than the thin crust. So this recipe gives the entire cheesecake an equal amount of thick crust.
To make a flat crust, just pour the crust mix into the prepared spring-form pan. Using the bottom of a flat cup (or measuring cup), press the crust down into the pan. You are not trying to smash it, you are just giving enough pressure to form it into a flat layer.
If you like your cheesecake with a thinner crust on the bottom and crust up the sides, you can do that with this graham cracker crust recipe. To do this, I dump the crust in the middle of the prepared pan and pack the sides of the pan first, using my fingers. I then press the bottom of the crust with the remainder.
Tips for making the Cheesecake Batter
The Cream Cheese Mix
I tested recipes changing only the type of cream cheese and I even began testing cream cheese combinations. I learned from this that using only Philadelphia cream cheese seemed to make a cheesecake that was too fluffy. Great Value cream cheese from Walmart made the worst cheesecake (not disgusting but just the worst of the bunch).
The cream cheese blend of Philadelphia and Lucurne produced the cheesecake that had the best texture. I was trying to stay away from Philadelphia cream cheese because it is an expensive brand of cream cheese. However, I found that if you are making cheesecake, it is not as good without Philadelphia brand cream cheese.
Do You Need Room Temperature Ingredients?
You will read in most cheesecake recipes that the ingredients need to be at room temperature. I only partly agree with this. When you are mixing the batter, you want to have an even, smooth texture. Having your cream cheese at room temperature seems to make the mixing faster.
However, I’ve made cheesecake with cold cream cheese and cold eggs. I initially did this because I did not want to wait for them to warm to room temperature. I’ve also never figured out a way to easily warm cream cheese or eggs.
The result was the same–an outstanding cheesecake!
Now, I don’t even worry about the temperature of the ingredients.
What type of vanilla to use
I tested types of vanilla by baking versions of this cheesecake that changed only the type and quality of vanilla. I then did a taste test with some friends and neighbors. I did this to see if people would generally prefer the cheesecake with the most expensive and highest quality vanilla. I hypothesized that the best vanilla would produce the best cheesecake.
That wasn’t the case.
There was no strong consensus.
The cheesecake people preferred the most (by a very slim margin) was the one with the cheapest imitation vanilla. My new hypothesis is that people in general are not well versed enough in vanilla flavoring that they can distinguish between expensive authentic vanilla and inexpensive imitation vanilla.
With this outcome in mind, I say that you can use whatever type of vanilla you have on hand. Also, feel free to test different vanillas yourself. If you do, let me know what you find in the comments.
Get the right texture before adding eggs
Adding eggs should be the last step to making the batter. The batter can take a beating beforehand. I once saw Gordon Ramsay make a cheesecake. He said that you never have to worry about over-beating cheesecake batter.
That being said, egg proteins will break down with beating. For instance, if you beat eggs too much, you will end up with a meringue.
To avoid overbeating the eggs, add them at the end and mix them at a slow speed just until they are well incorporated. Once you add the eggs, take it easy on the batter.
Cheesecake does not need a water bath
I did some research on why a water bath is necessary. I could find random blogs that would say that it helps regulate the temperature around the cheesecake. I could not find an actual scientific source. As far as I can tell, the water bath could just be an urban legend or a practice that has been perpetuated due to custom.
I suspect this idea is a carryover from woodfire ovens. I could see these types of ovens needing a water bath because the temperature was probably more difficult to regulate in these old ovens. Modern-day ovens don’t have this same issue.
Even if it is true that a water bath can more evenly disperse oven temperature, it leads to more problems than it solves.
For instance, most people will say to wrap your spring form pan in foil.
Have you ever thought that foil would be great for waterproofing? If you’re going on a river run and you don’t want your phone or keys to get wet, would you grab a square of foil?
No, you wouldn’t.
Water will find its way through any wrinkles in the foil and will get into your spring form pan. Once water gets in, you’ll end up with a wet crust.
Now, if you insist on using a water bath, you should not use a spring form pan. You can just use a well-buttered or lined regular cake pan. (To get the cheesecake out, you put it back in the oven long enough to warm up the butter so it will slide out–it works…most of the time). But your cheesecake will be fine without a water bath. Your oven will do just fine in baking the cheesecake without the help of a water bath.
Bake the cheesecake low and slow
I do not like the top of my cheesecake to be browned. I do not like the edges of my cheesecake to be stiff. If you bake a cheesecake at too high of a temperature, you end up with both of these things.
Baking the cheesecake at lower temperatures for a longer time prevents browning, stiff edges, and cracking!
Let the cheesecake cool completely
Once the cheesecake is out of the oven, you need to let it cool to room temperature before you refrigerate it. If you put it in the refrigerator before it cools down completely, the excess heat that would escape as steam will instead pool onto the top of the cheesecake as sweat.
If you let the cheesecake cool to room temperature, that should prevent the sweat.
However, if there is condensation on the top of the cheesecake, just dab it up with a paper towel. No harm done.
Let the cheesecake set in the fridge
Leave the cheesecake in the while it cools and in the refrigerator. The cheesecake will more fully set after being refrigerated for 4 hours. I think it is noticeably better if you can leave it in the fridge at least overnight.
You can cover the cheesecake with plastic wrap, or I actually use a kitchen towel.
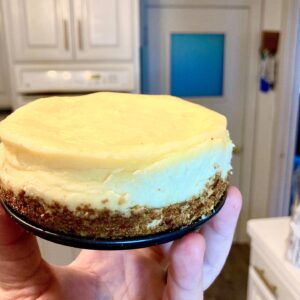
Removing the cheesecake from the pan
Once the cheesecake is fully set–meaning it has been refrigerated for at least 4 hours, it can be removed from the spring form pan.
To do this, first run a knife completely around the edges of the cheesecake. This will help separate the cheesecake from the sides of the pan. Then unclip the pan and carefully remove it.
To get the cheesecake off of the base, the easiest way is to put a larger cardboard cake round on top of the cheesecake. Flip it over so the cheesecake is upside down on the cake round. You should then be able to remove the spring form pan base and the parchment paper.
Next, place a second cake round (or the plate or platter you want to use for the cheesecake) on the cheesecake. You should now have the cheesecake sandwiched between two cake rounds. Now carefully bring the cheesecake back to being right-side-up.
Cutting the cheesecake
Cutting the cheesecake is best done with a warm knife. I just run it through hot water and wipe off the water before I cut. I cut all the way down and slide the knife back out while it’s at the bottom of the cheesecake. Do not bring the knife back up and out or it could tear the cheesecake on its way up.
If I’m trying to make it look really nice, I will run it through the hot water before every slice. That keeps the knife clean and warm for each slice. But since I’m not always trying to make it look nice, I more often just do my best to clean off the cheesecake residue with a fork or another knife in between slices.
A Great Base for a Variety of Flavors
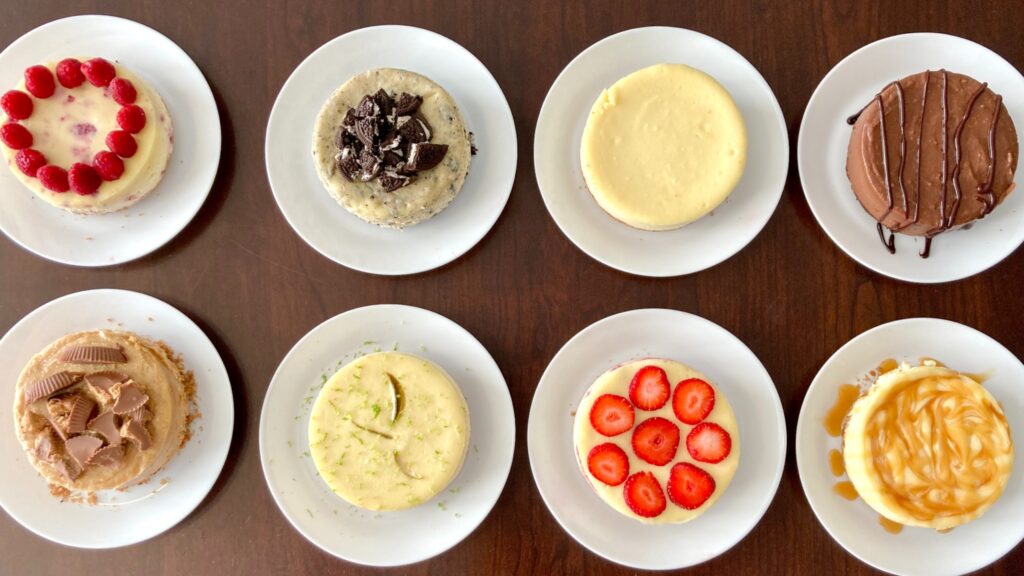
One of the greatest features about this cheesecake is that it is a great New York Style cheesecake as is. But if you’d like to add your own flavors, it is a great cheesecake base.
You can experiment by including your own added flavor. I’ve used this cheesecake base to make the following flavors of cheesecake:
- White Chocolate Raspberry Cheesecake
- Cookies & Cream / Oreo Cheesecake
- Chocolate cheesecake
- Peanut Butter Cheesecake
- Key Lime Cheesecake
- Strawberry Cheesecake
- Salted Caramel Cheesecake
- Pumpkin Cheesecake
If you stay tuned, I will share how I make some of these flavors. You can subscribe for update in the sidebar.
For more variety, use 4-inch Pans
If there’s one thing I like more than cheesecakes, it is having a variety of flavors of cheesecake.
For this reason, I specialized in making personal sized cheesecakes using 4-inch pans (purchased from Amazon). Each batch of the Ultimate World’s Best Cheesecake recipe will make approximately five 4-inch cheesecakes.
This means you can make the base, divide the batter into five parts, and end up with five different flavors of cheesecake.
When you do this method, you can bake the mini-cheesecakes all at once. Since each cheesecake is smaller, I bake them for 45 minutes before turning off the oven and venting. Everything else stays the same.
What I love about Cheesecake
Cheesecake takes a long time to make. It’s not one of those desserts where you can decide you want to have it that day. It’s usually best to make it the day before. In fact, I think the cheesecake tastes better after a full day of refrigeration.
I think partly because of the long prep time, and the complicated waterbath situation, people don’t make cheesecake all that often.
Cheesecake is a special dessert for special occassions. I love that about it.
I hope you’ll love it too.